Creating a project
Creating a new project is the best means of knowing all the information regarding a website and viewing the most up-to-date statistics about its traffic and returns.
From this section you have the ability to monitor keywords, thanks to the tracking feature that indeed keeps track of improvements or droppings in ranking, but also spy on the competition and get important information about the status of the website.
To proceed in creating a project just click on the + button in the “SEO Projects” section of the left column, or on the + button that appears in the Projects menu in the top bar, or even on the dedicated button you find when analyzing any domain.
 There are five steps to correctly set up the new project: let’s look at them in detail.
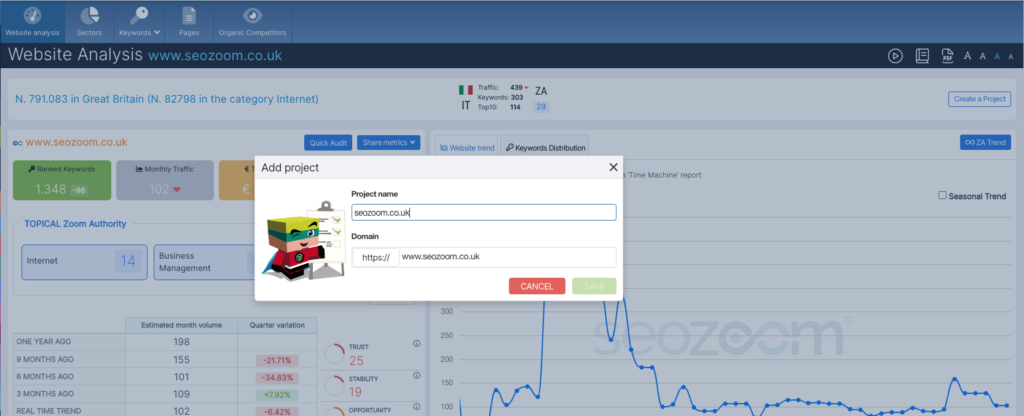 After clicking on New Project, a pop-up appears asking you to enter basic details, namely the name and address of the website: click on Save to proceed.
To continue with the configuration, click on “Set up Project” in the window that appears immediately after.
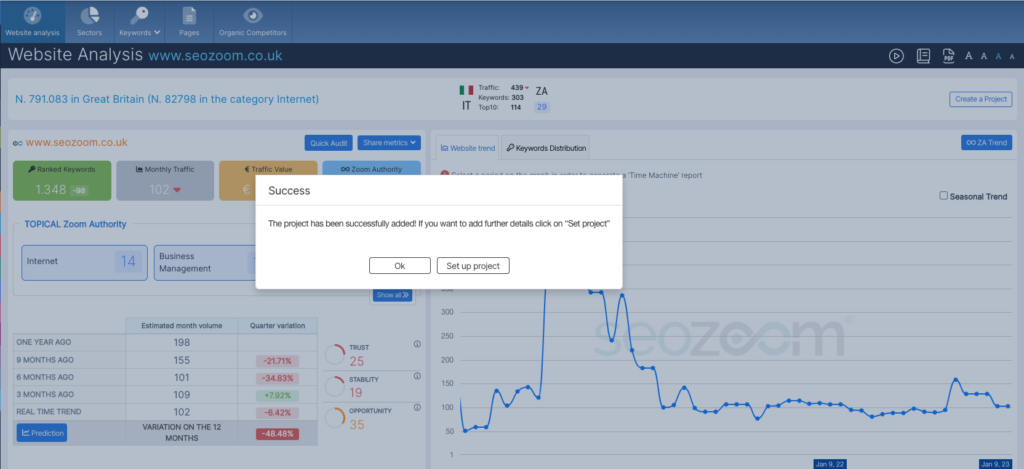 This will now open the section that allows you to add a list of Keywords to monitor, in which you can enter all the keywords that you think are important for your site and your strategy.
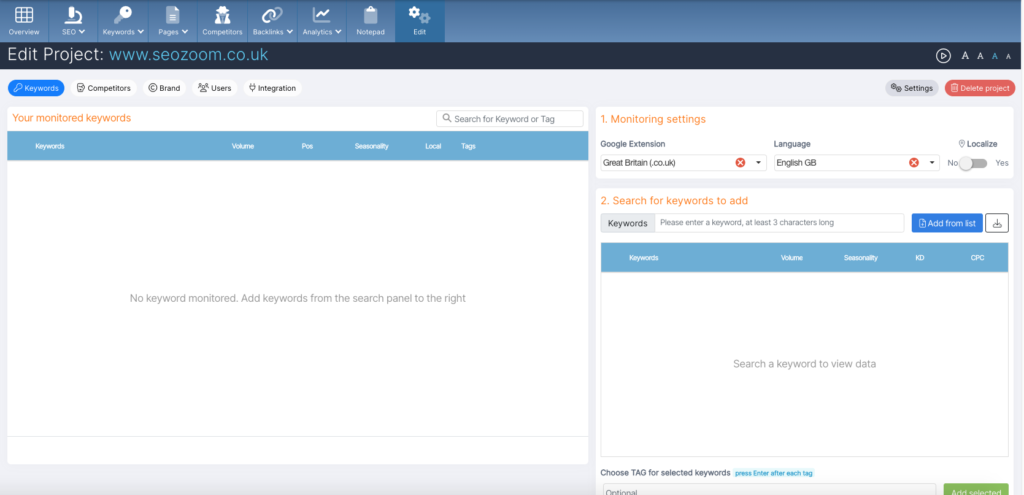 You can add keywords using the search function, the Add from list button, or the import tool (from .csv file or Google Search Console).
From here you also have another option, which is to use SEOZoom as a rank tracker to monitor the ranking of the keywords you are interested in on all international versions of Google. From Monitoring Settings, in fact, you can set the Google extension on which you intend to focus the analysis and its language, thus obtaining ranking information on the keywords you enter (but not the exact search volumes, which are only available for SEOZoom’s international databases).
Still in this area, then, you can also set up the monitoring of a keyword on a local basis, which is useful for queries strongly influenced by the user’s location: in fact, by default, SEOZoom analyzes SERPs by setting UK as the location, but in some cases you may need a more precise geolocation to really find out how your site and pages perform compared to competitors in the area.
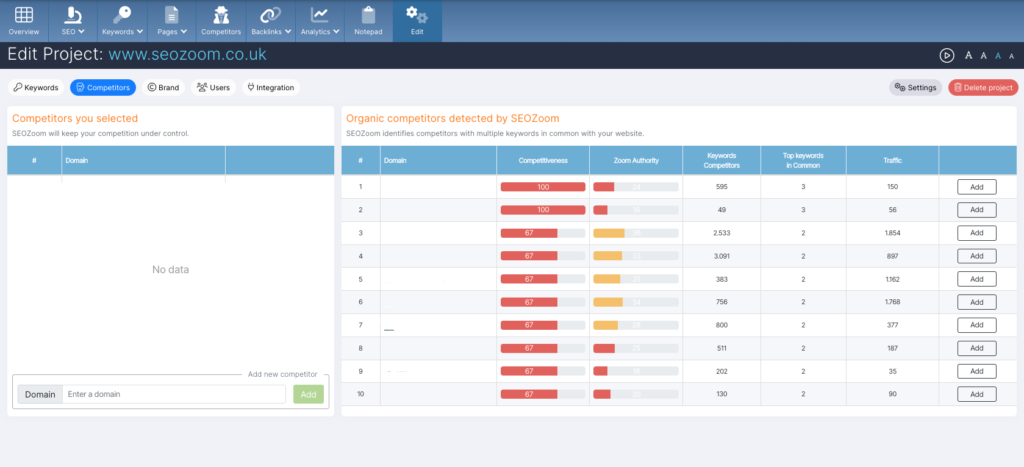
The next step is about adding and selecting competitors in SERPs that you have personally identified or that have been recognized by SEOZoom: in this way, you will be able to access the project’s competitor section and have data tailored to your interests and needs. You can also extend the list of competitors by entering different domains in the search bar.
 In the next tab you have the option to enter your brand name, people related to it, and specific products, information that SEOZoom will use to better monitor and verify your brand’s presence online by analyzing branded placements and proceeding with accurate branded link crawling.
To add an entry, simply type in the term and then “enter” with your keyboard so that a pillow tag will appear: you can fill in each field with up to ten items.
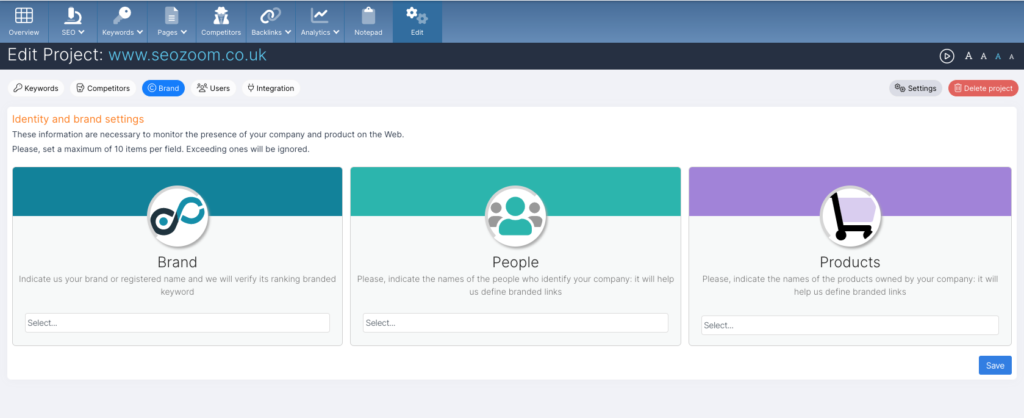 Having an idea of your brand’s presence on the web is a key aspect of an accurate marketing campaign, and SEOZoom helps you track brands, people or products related to a specific brand.
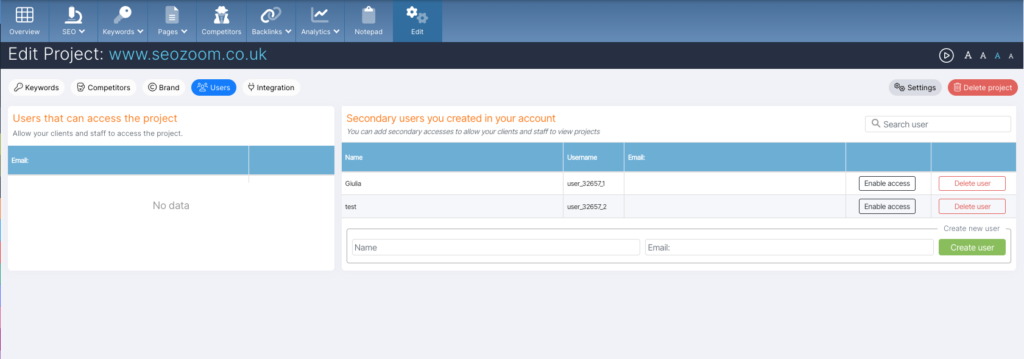
In the Users section, you can also provide access to one of your collaborators or external clients: this way, the user will be able to monitor data with the view-only function, for the individual project for which they are enabled.
To proceed, simply enter the person’s name and email and then click on Create User: the user will receive an email with instructions for accessing the suite and the project (i.e., from the link https://sz2020.seozoom.it/login ).
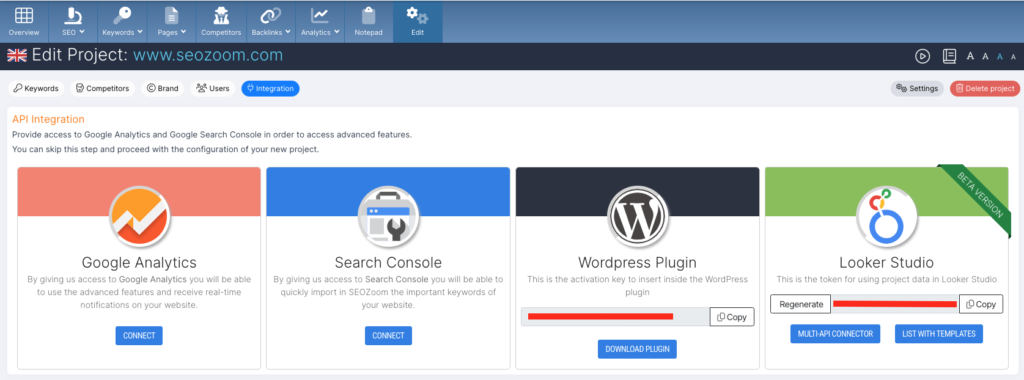
 In the last step, you have the opportunity to connect your project to the tools provided by Google. This way you can monitor your work more comprehensively, integrating data with data provided by Google Analytics, Google Search Console and Google Looker Studio. To make the connection, just click on Connect and enter your account information.
Google API integration is optional (not mandatory), so if you prefer, you can skip this step and save the project.
As for Looker Studio, the integration is available only for the Business and Corporate plans, is activated through the add-on menu and has a monthly cost. By proceeding with the purchase you will be able to create charts and reports in Looker Studio using SEOZoom data and metrics. Specifically, when you first log in you’ll need to retrieve a token that allows the Looker Studio connector to “communicate” with SEOZoom and derive the required data; in addition, you’ll also find a handy file with a list of ready-made connectors, created to simplify and speed up your work with ready-made templates that can be copied into a single Looker Studio report
Other optional features include the ability to install the SEOZoom WordPress plugin, which allows you to optimize content directly from your WordPress panel.
[Please note: at the moment, this feature is only available to users who activated the account before 2023, as the new and improved version of the plugin is under development].
Perfect: you have set up your project correctly, now all you have to do is climb the SERPs!


